Omaha Bombardment. Part II: The Plan
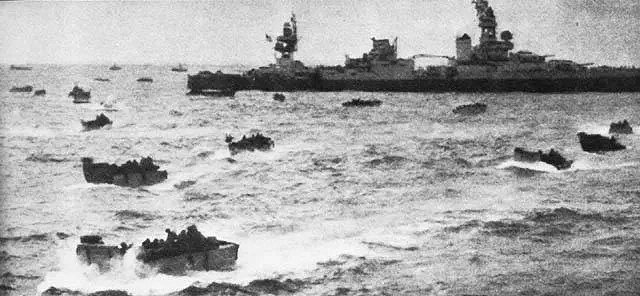
After much concern and many complaints about his perceived lack of naval bombardment assets, Admiral Hall (commanding the Omaha Assault Force) developed a detailed bombardment plan to make the best of what he had to work with. Published and refined in the weeks before D-Day, the plan sought to employ his limited assets in the most effective ways possible, going so far as to incorporate strategic heavy bombers and a variety of smaller, less conventional fire support assets.
This instalment examines that plan with an eye to determining how well those assets were allocated and the adequacy of the coordination and guidance contained in that order. This analysis calls into question the effectiveness of much of the plan, which left a substantial percentage of guns idle or assigned to non-essential targets during the preparatory bombardment. The plan also included factors that limited the effectiveness of the fires on the primary bombardment tasks.
Follow me on a deep dive into some of the actual factors that resulted in the failure of the Omaha bombardment mission.
Overview
With the basic form of Operation Neptune establish in the Initial Joint Plan and the Joint Fire Plan, and further amplified in Admiral Bertram Ramsay’s series of ‘ON’ orders, it was the turn of the subordinate commanders to begin formulating their own orders. The second tier of orders consisted of those published by the commanders of the Western and Eastern Naval Task Forces, led by Read Admiral Kirk, US Navy, and Rear Admiral Vian, Royal Navy. Kirk’s Western Naval Task Force (CTF-122), controlling Assault Force Utah and Assault Force Omaha, issued its operation order on 21 April 1944.[1] It was now time for RADM Hall, commanding the Assault Force Omaha (CTF-124) to get down to the stubby pencil work.
Hall’s planning had gotten off to a poor start, at least according to Ramsay, who had visited Hall in March to observe his Exercise Fox. Ramsay found the TF-122 staff badly organized and the task force itself not yet formed into task groups, even though they were at the stage of holding exercise rehearsals. Hall blamed the problem on a lack of staff officers. Whether Hall’s organization was as bad as Ramsay believed, the matter was not helped by the creation of Moon’s parallel staff for the Utah landings. Now both naval assets and experienced staff planners were split between the two commands. And until Hall formed his force into subordinate task groups—who would assume the burden of more detailed planning—his staff would be overworked if not overwhelmed. This contributed to many of the planning errors which I have highlighted in this series of articles.
Hall published his own order on 20 May,[2] a month after Kirk’s and two weeks after the final rehearsal exercise (Fabius), leaving his subordinate task groups and task elements just a few days to sequentially develop and publish their own orders.[3]
Organizing the Battlespace
Figure 1. Taken from the Fire Support Annex of the CTF-124 Operation Orde, this figure depicts the organization of the offshore waters at the Omaha Assault Area.
Hall’s order included charts which established routes, areas for specific activities and graphical control measures. In addition to establishing the Transport Area, it also established areas for his fire support ships. (Figure 1) The battleships and cruisers would arrive early off Omaha as they initially had the mission to support the minesweepers with counterbattery fire should German coastal defense sites try to interfere with the vital sweeping task. These big bombardment ships would anchor in the first areas cleared of mines (the so-called Swept Lanes). The two designated fire support areas for destroyers included Fire Support Area 3 (encompassing the Kansas and Oregon sectors) and Fire Support Area 4 (encompassing the far eastern area of the Ohio sector). The bulk of the Ohio sector consisted of the boat lanes for the beaching craft. The boat lanes were separate from the fire support areas, but some of the bombardment ships could operate in those lanes as required.
Destroyers were not to anchor but were to maneuver to maintain position against the current or to gain to better firing positions. Once the zones outside the fire support areas were swept of mines, the destroyers could use them for maneuvering. The area inshore of the 10 fathom line was believed clear of mines and was available for maneuvering. This requirement to “remain underway maneuvering so as to avoid mutual interference with lines of fire” was necessary but would have an adverse effect on gunnery. Destroyers were also instructed to “close the range as much as possible when delivering neutralizing and destructive fire.”[4]
Although not shown in Figure 1, the land area was divided into two sectors for the purpose of assigning counter-battery responsibilities. The boundary coincided with the boundary between the two assault regiments. The battleships, cruisers and destroyers operating in Fire Support Area 3 were responsible for Sector I (in the west), and those of Fire Support Area 4 were responsible for Sector II.
Organizing the Force
The various ships and craft of the bombarding force were assigned to different task groups at different stages of the operation. For example, the destroyers successively were part of the escort group during the Channel crossing, then part of the bombardment task group and then to the area screen. Within the context of the bombardment mission, the fire support groups were organized as follows:
- FS Group 1: USS Texas and HMS Glasgow
- FS Group 2: USS Arkansas, FS Montcalm and FS Georges Leygeus
- FS Group 3: Twelve destroyers/escort destroyers
- FS Group 4: Consisting of four sub-groups: a) Five Landing Craft, Gun (Large) (LCG(L)); b) Nine Landing Craft, Tank (Rocket) (LCT(R)); c) Sixteen Landing Craft, Tank (A) or (HE); and d) Seven Landing Craft (Flak) (LCT(F)). (The LCF did not figure into the bombardment plan and will not be discussed further).
- FS Group 5: Ten LCTs with 36 M7 Self-propelled artillery guns embarked.
- FS Group 6: Twenty-four Landing Craft, Support (Small) (LCS(S)).
Although not included in the CTF 122 task organization, there was another valuable gunfire asset present at Omaha. Kirk’s command ship, the heavy cruiser USS Augusta (CA-31), would be anchored in the swept lane of Fire Support Area 3. The nine 8-inch guns of her primary battery and eight 5-inch guns of her secondary battery made her the third most powerful warship at Omaha on D-Day, and were potentially a powerful addition to a bombardment force that was so short on ships that it was forced to rely on self-propelled artillery firing from bobbing LCTs. But would it be incorporated into the bombardment plan?
Targets and Targeting
Considerable effort had been expended to obtain as much information on enemy dispositions as possible. Most of the intelligence came from aerial photography and reports from the French resistance. Although intelligence had missed the movement of the German 352nd Division into the area, it had nevertheless complied a fairly comprehensive index of German positions on and behind the beaches. The Vth Corps and TF-124 staffs developed a target list of almost 140 locations. Many of these were important terrain features (e.g., beach exits, road junctions, etc.) but the majority were occupied enemy positions.
One hundred and forty targets were obviously beyond the capability of Hall’s bombardment force, but that wasn’t a problem. Many of those did not need to be struck during the 40 minutes of preparatory fires, and many others were so close together that they could be suppressed by a single fire mission. And many more were simply included in the list as they seemed likely to be engaged as combat ashore progressed.
For the purposes of the pre-H-Hour bombardment, the important targets fell into two categories. The first were enemy coastal artillery positions that could threaten Hall’s ships and craft. Hall was particularly sensitive—excessively so in some opinions—about the danger from two such batteries: Pointe du Hoc to the west and Longues-sur-Mer to the east.[5] Although Pointe du Hoc was supposed to be assaulted by the Rangers at H-Hour, and Longues was about 5,700 yards outside of Hall’s sector to the east, both positions housed 155mm guns with estimated ranges of 26,000 yards. The range fans of these two batteries worried Hall to the extent that he chose an extremely long distance offshore for the Transport Area: 23,000 yards. (Figure 2) Ramsay had tried to convince Hall to bring it in closer; the British Transport Areas were much closer, despite facing similar or more numerous enemy batteries. Hall refused. It was a mistake. The excessively long ride to the beach contributed to the loss of LCVPs and LC(A)s, and seriously reduced the physical state of the assaulting troops.
Figure 2. This map shows the major coastal artillery batteries and their range fans. The Omaha Transport Area lay just inside where the range fans for the Pointe du Hoc (the red circle) and Longues-sur-Mer (the blue circle) batteries intersected.
Countering coastal artillery batteries (a defensive task) was doctrinally the job of battleships and heavy cruisers, with light cruisers (6-inch/152mm guns) acceptable in a pinch. Hall had two battleships that could handily suppress a 155mm battery, and potentially the heavy cruiser Augusta (8-inch/203mm guns) as well. As the Longues battery was in the Gold Assault Area (to be targeted by HMS Ajax, a 6-inch cruiser from that force), Hall was left with just one serious threat, and two heavy ships (and possibly a third: the Augusta) to deal with it. So, Hall was in excellent shape. But the battery at Pointe du Hoc was not the only coastal artillery battery. Port-en-Bessin, at the boundary between Omaha and Gold Assault areas, contained a cluster of smaller caliber guns as well as a few smaller German gun boats, similar to the LCG(L), all mounting 4.7-inch guns or smaller. These would need to be dealt with.
The principle offensive task during the pre-Hour bombardment was preparatory fires, defined as:
“. . . intensive fire delivered on the landing beaches and adjacent areas during the approach to the beach of the landing craft of the leading wave.”[6]
The preferred ships for this task were the destroyers due to their high rate of fire with decent-sized projectiles. Light cruisers were also good in this role. The heavy cruisers and battleships were less desirable; despite their far heavier shells, their slower rates of fire made them less effective in the drenching fire role, and made them more suitable for deep support missions.
And of course, the heavy bombers would play a role in both the defensive and offensive tasks - more on that in a later installment.
One of the perennial issues in amphibious operations was the competing priorities of the naval and land commanders. Target selection naturally was an interest to both the Navy (who was concerned primarily with the defensive task of neutralizing enemy coastal artillery) and the Army (who was primarily interested in the offensive task of neutralizing enemy beach defenses). This was a matter that vexed Ramsay several times during the planning phase.
“The Army appear to think it is their right to dictate the targets for air & naval guns whereas up to the time the Army are established ashore by the Navy, I maintain that the employment of air and naval guns is mainly a matter for the Naval C in C.”[7]
There appears to be no indication Hall and Major General Gerow (the Vth Corps commander) had any serious disagreement in this regard, but it remains to be seen how Hall’s allocation of fires between the defensive and offensive tasks might have affected the success of the landings.
Intelligence Failure
It’s important to note what was not included in the target list: the German field artillery batteries. Indirect fire (gun/howitzer artillery, rockets and mortars) are the principal casualty inflicting weapons in modern warfare. Small arms fire, wire obstacles and minefields primarily serve the defender by slowing or halting the attackers in a kill zone where they make lucrative targets for indirect fire. As a result, neutralizing the enemy field artillery units generally has a very high priority. And yet there was only one ‘possible’ field artillery position included in the target list—and it was not scheduled for bombardment.
This omission was a gross error. It was not, however, an error in judgement among the planners. It was a failure of intelligence. Allied intelligence had completely missed the forward repositioning of the German 352nd Infantry Division into the coastal defenses. And as troops of the 352nd thickened the bunkers and trenches at Omaha, their artillery moved forward as well; in fact, it had moved forward before the infantry units had. Where there had been just one four-gun 105mm battery supporting the beach defenses, seven batteries could range the beach on D-Day. Four of these were 105mm batteries and the remainder were 150mm batteries (the latter were just as dangerous as the guns of Pointe du Hoc).[8]
The presence of troops and field artillery batteries of the 352nd Infantry Division were not the only intelligence failures. Rommel had spurred a frantic rush to increase defensive works, and Allied intelligence was simply unable to keep up with the rapid developments. Take for example the two most deadly direct-fire weapons the Germans had on Omaha Beach: the two 88mm anti-tank guns. The 88mm gun emplaced in WN61 (E-3 Exit) had only been completed in late April, while the one in WN62 had been completed only in late May.[9] Had their presence been known, or even suspected, Hall’s targeting priorities may have been much different.
As the plans were finalized, the two most deadly categories of German weapons were not even addressed by the bombardment planners: the field artillery batteries and the 88mm anti-tank guns.
Target Assignments
Part of the art of targeting lies in the selection of the targets that needed to be struck, and the assignment of the right bombardment guns and projectiles for the job.
Navy armor-piercing shells had a delay fuze and were effective in penetrating concrete structures; but they had relatively less high explosives filler than Army projectiles of similar caliber. The Navy ‘common’ shell had lower penetration, a somewhat higher proportion of high explosives and an instantaneous fuze. The Army landing manual rated them as “not well suited for general use in support of a landing,” though the AP rounds would be useful against concrete bunkers and casemates, if a direct hit could be scored. The Army rated the Navy’s HC shells (High Capacity, i.e., thinner-walled projectiles with more high explosives) and AA shells (anti-aircraft shells, sometimes referred to as ‘AA common’) more highly and said they should make up the bulk of the supporting fires.[10] (The AA shells had roughly 3 times the explosive filler as the common shells.) The bombardment plan explicitly specified shell types only for the battleships. However, the plan did include the following guidance:
“Destroyers will use a high ratio of common type projectiles in pre-landing bombardments.”[11]
It isn’t clear why Hall’s plan favored a less capable projectile for the destroyers during the critical bombardment phase, but it may be one reason the bombardment was not as effective as hoped. The fuze/shell combinations that were actually fired on D-Day will be covered in a later installment.
Now, let’s see how the bombardment plan combined these assets and against which targets.
14-inch and 6-inch Guns
With an abundance of battleships and cruisers—at least in regard to the number of coastal artillery batteries—Hall had some flexibility in assigning these ships to targets beyond their doctrinal defensive role. Figure 3 illustrates target allocation for the primary batteries of each of the two battleships and three cruisers. He assigned two ships to defensive missions: the Texas’ 14-inch guns targeted the battery at Pointe du Hoc with up to 250 rounds (65% AP/ 35% HC) and very briefly the adjacent St. Peirre du Mont infantry position (12 rounds, HC), while the Montcalm’s 6-inch guns targeted the smaller enemy guns at Port-en-Bessin with 300 rounds. These two ships easily overmatched their targeted batteries in caliber, number of guns and rate of fire. There was one disconnect with the Texas, however. Because the CTF plan specified the ratio of HC to AP rounds, the subordinate fire support unit commanders were not authorized to change that ratio. RADM Bryant was the commander of the Bombardment Group (CTG 124,9), and he flew his flag from the Texas. Bryant’s order specified that HC shells should be used in counter battery fire, not AP.[12] This was likely in recognition of the fact that the guns of Pointe du Hoc were believed to be in open gun pits. Not all the smaller guns at Port-en-Bessin, however, were in open emplacements.
Figure 3. Targets assigned to the main batteries of the battleships and light cruisers.
That left Hall with the Arkansas and two cruisers he could devote to neutralizing beach defenses. The defenses at Exit D-3 received the bulk of their attention, with WN68 being the focus of two of the Arkansas’ fire missions, and WN66 receiving a third (385 rounds for all three of its missions; 70% HC/30% AP). Although Ramsay specified the objective was merely neutralization, Hall’s order specified destructive effects for these Arkansas fire missions. They were the only targets at Omaha for which destructive results specified. When destructive effects are desired, F.T.P-167 advised HC shells should be used with delayed fuzes, a point whose significance will become apparent later.
WN66 also received the full attention of the Glasgow’s main battery (400 rounds).
The Georges Leygues’s main battery was assigned WN64 (250 rounds)
4-inch and 5-inch Guns
One destroyer, the Frankfort, would play no role in the pre-H-hour bombardment. Although it was the flagship for Destroyer Squadron 18 (DESRON18) and had the squadron commander aboard (who therefore commanded the 12 ships of the Destroyer Fire Support Group), it was initially tasked with organizing the offshore screen,[13] so was not physically in the fire support areas until after H-hour. The absence of the squadron commander could pose problems for the bombardment, and it is a point to keep in mind when we examine the execution of the plan. The two destroyer division commanders, however, remained in the fire support areas and should have provided continuity of command.
The secondary 5-inch batteries of the two battleships were employed against WN71 (Texas, 250 rounds) and WN61 (Arkansas, 250 rounds). (Figure 4) Although each battleship had six of these guns, they were in casemate mounts, so only the three guns from the engaged side of each ship could fire these missions. With a rate of fire of 8-9 rounds a minute, a battery of three such guns should have been capable of firing the allotted 250 rounds during the bombardment.
Figure 4. Targets assigned to the destroyers and the secondary batteries of the battleships.
Six of the US destroyers were assigned targets defending the Dog through Fox beach sectors. Each of these targets was one of the German resistance nests along the beach (except for WN69, 66 and 64). These destroyers were each tasked with from one to three targets and allocated 250-350 rounds.
Interestingly, no 5-inch fire was allocated against the defenses at the D-3 Draw. Only the 12-inch guns of the Arkansas and the 6-inch guns of the Glasgow were turned on these positions. This might provide an interesting test case as to whether the larger 12- and 6-inch guns were more effective in the neutralization/destruction role than the lighter 5-inch guns.
One thing summary discloses is that Hall’s bombardment plan had inserted targets that did not directly address counterbattery or beach neutralization tasks. (Figure 5) One destroyer, the Satterlee, was assigned two adjacent targets (in WN76) a kilometer west of Pointe du Hoc. This was a curious choice for a command that was short on bombardment ships, especially as 300 rounds were allocated to its neutralization. The targets were not in a position to threaten the landing at Pointe du Hoc. The target list did not identify any enemy force at that position, and the intelligence overlay indicated it was only occupied by a squad.[14] From a point, more than 80 years removed, it would seem this target would have been better addressed after H-Hour, and Satterlee would have been better employed elsewhere during the bombardment period.
Figure 5. This chart shows how the guns of the Bombardment Group were allocated missions for the pre-H-Hour preparatory fires phase. Forty-one of the 132 guns were not allocated to either of the two primary tasks during that phase.
Similarly, the destroyer Thompson was assigned two targets, which were separated by more than 400 yards (meaning one fire mission could not cover both targets), in the vicinity of Pointe et Raz de la Percée (WN74, 450 rounds). This area was the assault objective for the two companies of the 2nd Ranger Battalion that were to land on the Charlie beach sector, but they would not be in position to assault the strongpoint from the landward side for at least an hour, as they would have to scale the cliffs of Charlie beach sector and then maneuver to WN74. Thus, Thompson’s fire would cease on one of the targets (the defensive works) far too early to be of any use in supporting the Ranger assault. The second target within that strongpoint, however, included two 75mm guns facing generally east toward the Dog beach sectors and was a legitimate target for the bombardment period.
Although Hall complained about the lack of bombardment ships, his plan took three destroyers largely out of the fight. One (Frankfort) was diverted to the screen, one (Satterlee) and a half (Thompson) were diverted to targets not critical to either defensive or offensive tasks; only half the firepower of a single ship of the three (Thompson) was committed to a defensive task.
Among the British Hunt class ships, we again see the diversion of guns from both the defensive and offensive tasks, with Talybont firing four missions (about 400 rounds) against two German positions between Pointe et Raz de la Percée and Pointe du Hoc. Neither of these positions threatened the amphibious shipping nor contributed to neutralizing the beach defenses. While they did contain German troops, these could have been targeted after H-hour, thus freeing up the Talybont for beach defense neutralization.
Similarly, Melbreak, off the east end of the beaches, was assigned a single fire mission against WN59, three kilometers east of the E-3 exit. It had no weapons to threaten the amphibious shipping, nor did it cover any of the landing beach sectors. The firing period for this mission was from H-40 to H+60, with 300 rounds allotted.
Only Tanatside seems to have contributed to either the defensive or offensive tasks, being assigned two fire mission against WN65, on the west side of the E-1 exit (400 rounds).
Although the figures varied between ships, generally they were allotted roughly 25%of their magazine capacity for the bombardment phase. This was in line with guidance from F.T.P-167, which also reserved another 25% for targets of opportunity after H-Hour. The CTF-124 plan directed the 5-inch ammunition allowance for destroyers to be:
1250 rounds AA common (7.11 - 8.4 lbs. explosive filler)
250 rounds common (2.58 lbs. explosive filler)
45 rounds White Phosphorus (smoke)
100 rounds illuminating
200 round AA special (Variable time fuze)
LCTs / M7 Self-Propelled Artillery
The 36 self-propelled howitzers of the 58th and 62nd Armored Field Artillery Battalions were embarked in 10 LCTs. They were assigned targets at opposite flanks of the beach, with 100 rounds allocated per gun, for a total of 3,600 rounds to be fired in a 25-minute period between H-30 and H-5. In theory, this represented a significant addition to the bombardment. (Figure 6)
Figure 6. Targets assigned to the LCT(R)s, LCG(L)s, self-propelled artillery and PatrolCraft.
The guns were due to start firing at about 8,000 yards (at H-30) and continue firing as the LCTs slowly cruised toward the shore, ceasing fire at about 3,700 yards (expected to be at H-5). The guns faced two major challenges to accuracy. First, the motion of the LCTs in even moderate seas would play havoc with the trajectories. Second, as the range decreased, that variable had to be continually factored into the gun data. There were two methods of doing this. The first was simply sighting the target in the direct fire mode and adjusting the gun’s elevation for each round. It’s doubtful the sights on the self-propelled howitzers were adequate to identify the assigned targets at those ranges except in the most general geographic sense, and this method depended on the skill of 36 individual gunners. These factors did not promise good results.
The second method was the clock method, which was based on the assumption that the LCTs would close the beach at a predictable pace, and the gunnery data could then be pre-calculated and changed on a time schedule while firing. This was the method taught at the Assault Training Course and seemed the more precise, or rather less inaccurate, method.
There is little in the records that documents the training, planning or firing while afloat by these two battalions. As to how they performed the gunnery tasks on D-Day, there is only a single off-hand comment that they shot in the direct fire mode.
The technique of using self-propelled artillery firing from LCTs did not appear promising. During Exercise Trousers (12 April), Ramsay observed 90% of the shells fell into the sea.[15] A week later, however, at the next exercise (Exercise Smash III, 18 April) he noted they fired “good, the best I have seen . . .”[16] As promising as that improvement might be—and he did not indicate how effective that relative improvement was—those were British exercises and did not reflect whatever proficiency the American units at Omaha had achieved.
LCT(R)s
The nine LCT(R)s were part of CAPT L. S. Sabin, Jr.’s Gunfire Support. These LCTs originally had been given to the British through Lend Lease. For Neptune, they were to be modified to carry about 1000 rockets each and ‘reverse Lend Leased’ back to the US. The craft were delivered late and were in very poor material condition. Although they had begun forming crews for these craft by the end of 1943, the late delivery of the craft posed major training hurdles. As of 5 May, only two of the LCT(R)s destined for Omaha were on hand, with the remaining seven arriving on the 6th, 17th and the final craft during the last week of the month. The late delivery of the LCT(R)s meant all nine crews had to rotate on the two available craft during training, resulting in minimal depth of experience for the raw crews. By the time the last seven craft began to arrive, the British Assault Gunnery School had closed and the LCT(R) flotilla had to conduct makeshift training on their own. Only one craft had participated in Exercise Tiger (it did not fire) and another in Exercise Fabius. None of the crews were experienced in basic seamanship, ship handling or use of the rockets. Two crews:
“ . . . joined the assault forces without ever having handled their craft except in the passage from Base Two and without ever firing rockets except at the Assault Gunnery School.”[17]
Sabin rated his LCT(R)s’ readiness as:
“Generally poor except for two or three early deliveries which reached a satisfactory state of training.”[18]
The rocket craft were assigned beach neutralization targets along the landing sectors, mostly targeting strongpoints flanking the four draws. (One craft was assigned the 75mm guns of WN74 at Pointe et Raz de la Percée). Nine thousand rockets should smother the beach defenses in the five minutes before the first wave landed. The intent was for these craft to take position about 2,700 yards behind the first wave, and fire their rockets when the first wave LCT(A)/(HE)s were 300 yards offshore, but the erratic nature of these rockets caused this to be increased to 500 yards. The rocket craft had radar to determine the range and were to fire ranging shots to confirm the distance before firing their full salvos.
LCG(L)s
The LCG(L)s were converted LCT(3) hulls, and they also suffered from late delivery and a rushed training program. Nevertheless, Sabin rated their readiness on the eve of the invasion as fair.
Mounting two 4.7-inch guns, they were to take position to the flanks of the first wave (the LCT(A)/(HE)s) and fire on specified targets from H-20 until just before H-Hour (the specific time varied by craft). All of their targets were offensive, consisting of immediate beach defenses, and there were about 150 rounds of ammunition allotted for each LCG(L). Note that the 4.7-inch guns were a larger caliber than those mounted in the Hunt class destroyers, though the latter were better gunfire craft with better gun control systems.
LCS(S)s
One other category of fire support craft was at hand. These were the Landing Craft, Support (Small) (i.e., LCS(S)) of Fire Support Group 6. Their firepower was so small that Hall’s plan did not bother to assign them targets. Nevertheless, there were 24 of them, each mounting machine guns and launchers for 24 rockets (with 24 reloads). Their mission was to guide in initial waves and provide last minute suppressive fire starting 1,000 yards from the beach.
Although not included in any of the fire support groups, there were six patrol craft that would serve as the primary control craft for the various beach sectors. As each of these patrol craft mounted a 3-inch gun, they were assigned specific targets and were each allotted 50 rounds to fire between H-25 to H-5.
Key Guidance
In addition to these provisions, Hall’s plan included many details to regulate the bombardment.
One of these details conflicted with Ramsay’s ON 8, and would prove to impact execution on D-Day. Under ‘Close Support Fire—Drenching of Beach Defenses’,[19] Ramsay directed:
“A high rate of fire is to be maintained during this period, even though continuous spotting is likely to be impractical.”[20]
Hall’s order, however, stated:
“Ships are not to employ rapid fire for more than one minute without correcting for range and deflection.”[21]
Hall’s guidance appears to mirror that which Ramsay had issued for counterbattery fire (the section preceding the Close Fire Support section), but the CTF-124 order stated it in a context that applied to fire support missions in general. Under Ramsay’s instructions, a destroyer whose preplanned bombardment target was shrouded in dust should continue firing. Under Hall’s instructions, the destroyer would have to cease firing as they could not spot and correct their fire. This situation was hopefully clarified by the CTG-124.9 (RADM Bryant’s Bombardment Force) order that stated:
“(12) Due to dust, haze and general confusion, air spot for scheduled firing may not be available. In such case carry out fire on scheduled targets using best data available.”[22]
In reality, it was an open question as to which instructions a ship’s captain would follow. It was an opportunity for confusion, and Chaos seldom lets such opportunities pass.
Another note in Hall’s order raised another question:
“Fire missions assigned Destroyers and LCG(L)s and scheduled above to close between H-5 and H-2 shall be continued until LCT(A) – LCT(HE) wave fouls the range.”[23]
As a result, positioning of the destroyers would be key to whether they might be forced to cease fire before H-5 or were able to continue as long as the leading wave might be delayed. Unfortunately, Hall’s order did not specify the destroyers’ positions other than assigning them patrol areas—in which they were to remain maneuvering underway—so at this point it isn’t clear if there was adequate effort to deconflict gun-target lines and wave approach bearings. That level of detail was also not addressed in RADM Bryant’s order for the Bombardment Group or in CAPT Harry Sander’s order for the Destroyer Fire Support Group.[24]
More than Just Lobbing Shells
Unnoticed in the plan was small bit of confusion that would have significant impact on D-Day. The US destroyers had no experience with shore bombardment in an actual invasion, and their training in the UK had been limited by insufficient ammunition allocations. The Arkansas had yet to fire any of its guns in anger in WWII, so was completely new to the intricacies of beach neutralization. Even the Texas had had only a brief experience with bombardment, and that was in 1942 during Operation Torch. The confusion centered around their understanding of the concept of neutralization, which in a number of cases would lead to premature suspension of bombardment. As a result, the conduct of fire by several of these ships turned out to be not at all what was expected, either in terms of the number of rounds fired or in synchronization with the landing of troops. Somewhere along the line, the bombardment force hadn’t fully understood the nature of their task. A more complete explanation of this disconnect will have to wait for the next installment.
The Problem with the Pointe
The six 155mm coastal artillery guns at Pointe du Hoc seemed to have had a hypnotizing effect on the planners at all levels, but especially within Hall’s staff. This battery was easily overmatched in caliber, number of guns and rate of fire by the Texas (ten 14-inch/356mm guns) and the Arkansas (twelve 12-inch/305mm guns) and was even overmatched in terms of number of guns and rate of fire by each of the three cruisers (nine or twelve 152mm guns per cruiser). More importantly, the Pointe du Hoc battery was a German Army unit, which meant its director and fire control systems were not at all sufficiently refined for engaging moving naval targets. Most telling of all, the battery position consisted of open gun pits (excepting for the two initial casemate positions that had been damaged). They could be easily neutralized, even by a destroyer, using time-fuze (air burst) projectiles.
Doctrinally, battleships and cruisers were the best platforms to neutralize coastal artillery batteries, but this would seem to have been one of the obvious cases to ignore the manual. The nature of the Pointe du Hoc battery simply was not as serious a threat as was feared.
The battery position did still need to be neutralized, if for no other reason than to assist the Ranger assault, but this would have been better served by a destroyer such as the Satterlee, which according to the plan would be wasting its pre-H-Hour shelling on a non-critical target to the west. This would have freed up the main battery of the Texas for employment against defenses at one of the two primary exits.
The Naval Bombardment Plan – A Lack of Focus?
Our initial focus was on Hall’s allocation of bombardment ships between offensive and defensive targets. But this examination reveals he had introduced a third mission set. During an assault, a basic tenet of fire support is that as troops close on the objective, the fires are then shifted to the flanks and rear of the objective to seal it off from reinforcements, pin enemy formations in place, etc. This shifting of fires would fall into the Navy’s Close and Deep Support categories. Several of the target assignments discussed above clearly fall into those support categories, but were incorporated into the short pre-landing preparatory fires. There’s nothing particularly wrong in doing that, assuming you have ample support assets to adequately do the beach neutralization tasks, and have enough excess guns for any support tasks. Hall, however, made it abundantly clear he felt he did not have adequate bombardment ships. Thus, every gun Hall diverted to these support tasks further hamstrung the beach neutralization effort, which he felt was already critically under-supported.
The Satterlee, Talybont and Melbreak (and half of the Thomspon’s firepower) were all assigned to targets which neither threatened the amphibious shipping nor played a role in the immediate suppression of the landing sectors. There were probably reasons to shell those targets, but nothing so time-sensitive or imperative that they needed to divert scarce guns from beach neutralization in the equally scarce time allotted for that task. Indeed, the targets for those three ships could, and probably should have been shelled after H-Hour. In much the same vein, only one of Thompson’s two targets (the set of 75mm guns at Pointe et Raz de la Percée) demanded attention prior to H-Hour. The second target could wait until later.
Having brought up the topic of “lifting and shifting” fires after H-Hour, it must be noted that Hall’s plan virtually ignored this mission set after H-Hour—at least as far as the ground combat was concerned. Virtually all of the pre-planned fires starting after H-Hour were directed against defensive targets (enemy positions that threatened amphibious shipping). Montcalm and Tanatside would continue shelling Port-en-Bessin. Melbreak would continue shelling its ‘isolation target’ past H-Hour and through to H+80, at which time it would further pile on Port-en-Bessin. Satterlee, Talybont and Thompson would continue firing on their pre-H-Hour targets for times ranging from 15 to 45 minutes after H-hour.
Only four ships had new preplanned targets assigned after H-Hour. The Arkansas would shoot 50 rounds of harassing fire at the city of Treviers, 8 kilometers south of Vierville (identified merely as ‘troops in town). Destroyers Carmick, Emmons and Doyle were allotted a combined total of 150 rounds to shell six grid coordinates (not further identified) located at the heads of the D-3, E-1 and E-3 draws. These were scheduled to last just 20 minutes, with an average of only 25 rounds per target.
In summary, Hall’s plan wasted the firepower of three and a half of his destroyers on targets which neither threatened the amphibious shipping, nor contributed to neutralizing the beach defenses, to which must be added the diversion of the Frankfort to the screen. These four and a half ships would have been an important addition to the firepower of the seven and a half destroyers that were committed to neutralizing the beach defenses. It must be noted that the 1st Division order for the invasion seems to have been fully in agreement with this diversion of firepower.
And finally, the cruiser Augusta. As Kirk’s flagship (with Bradley aboard), the Augusta did not fall within Hall’s task organization. In fact, in addition to its role as the CTF-122 command ship, it was also part of the Reserve Gunfire Support Group (CTG-122.5 - more on this unit at a later date!). As it was the sole heavy cruiser present and already had a gunfire role, the omission of its 8-inch guns from the bombardment plan raises serious questions. If Hall—and Kirk—really felt so strongly about the shortage of bombardment ships, it is odd they could not find a way to to incorporate the Augusta into the bombardment plan.
So, it would seem that the plan’s allocation of ship to mission roles was faulty, and failed to weight the allocation sufficiently to beach neutralization. But what about allocation of fires to key targets within those mission roles? This is a difficult question as neither the naval plan nor 1st Division plan gave any relative priority to eliminating any resistances nests or opening any exits. All were treated as the same priority and the assumption seemed to be that the beach defenses would be knocked out in stride; most of the order focused on achieving objectives well beyond the beach.
There were two paved roads off the beach, through the D-1 and D-3 exits, and you might assume they would be given higher priority, but they were not. In fact, the 1st Division’s Traffic Circulation Map indicated traffic leaving the beach would go through the D-3, E-1 and E-3 exits, with return traffic to the beach down the F-1 exit. The paved road at the E-1 exit was not part of the traffic circulation off the beach to the vehicle transit areas.[25] Although there is no evidence of a direct linkage between this traffic circulation scheme and Hall’s fire support plan, the relatively light fires devoted to WN71, 72 and 74 may have been influenced by it not being a one of the beach exit routes. The plan assigned only two 5-inch fire missions against these three targets (McCook and Texas’ 5-inch battery for a total of 550 rounds). Three LCG(L)s, one rocket barrage one third of a battalion of self-propelled guns and two patrol craft were also to be concentrated on these positions, but all those assets had severe accuracy problems. The only fires whose accuracy could be relied on were the 5-inch guns. It was not an impressive concentration of firepower considering how dangerous those defenses turned out to be.
As for the D-3 exit, recall that the Arkansas was assigned a destruction mission against WN66 and WN68. The plan called for 70% of the 385 rounds to be HC, and the destruction role called for delayed fuze. This would virtually guarantee heavy cratering of the paved road through the D-3 draw, negating much of its early value.
The defenses at the E-3 exit, guarding the unpaved secondary road, also included three positions: WN60, 61 and 63. The firepower concentrated here was substantially greater, although the three positions were dispersed over roughly twice as wide an area as at the D-1 exit. Nevertheless, four destroyers and the secondary battery of the Arkansas targeted those defenses with 1,450 5-inch projectiles. Three LCT(R) rocket barrages were also dedicated to this area as were all the self-propelled howitzers of the 62nd Armored Field Artillery Battalion. Even in terms of planned air strikes, the E-3 draw was more heavily target with five strikes as compared to three at the D-1 Exit. Only the LCG(L) support was lower at the E-3 exit.
It isn’t clear whether the CTF-124 planners were aware of the presence of the 88mm guns at the D-1 and E-3 exits. As noted earlier, the gun position in WN61 was completed in late April, and the one in WN72 was completed in late May. The fact that the bombardment plan did not target those positions with anything greater than 5-inch guns tends to indicate they were not aware of those threats. The 1st Division’s plan indicates they were aware of the new casemate in WN61 (with no indication of the size of the gun) but appeared totally unaware of the new casemate in WN72.[26] Being apparently unaware of the latter 88mm gun position, the planners seemed to have had no particular reason to target the E-1 draw’s defenses more heavily.
We can form some conclusions from CTF-124 targeting. It appears it failed to effectively use its bombardment ships, with a significant portion of the firepower diverted to secondary targets or diverted to non-gunfire missions. The bulk of Hall’s firepower (in terms of sheer volume of projectiles) rested on the self-propelled artillery and the LTC(R)s; the former being highly unreliable and the latter seriously under-trained. Aware of the deficiencies of both of those assets, one would think the CTF-124 plan would have more fully exploited the battleships, cruisers and destroyers in the beach neutralization role. In addition, several planning factors would contribute to lessening the effectiveness of the bombardment, such as the instruction to use a high ratio of common rounds, and instructions requiring a halt to rapid fire after one minute to verify spotting. And there was more . . .
Target Geometry and Gun-Target Lines
Figure 7. An example of a German gun casemate with the embrasure protected by a ‘wing’ of blast wall.
In his report on the invasion, Hall remarked on the difficulty of spotting the enemy’s gun positions because they were sited to enfilade the beach and were protected on the seaward side by concrete and earth walls which not only protected the bunkers but shielded the gun muzzles and embrasures from view.[27] This should not have been a surprise as the weekly ‘Martian’ intelligence reports (dating prior to 20 May when Hall’s order was issued) included detailed drawings of the typical gun bunkers used by the Germans. These plainly showed the protective blast wall that shielded the gun and embrasure against observation and fire from directly offshore.
If the planners did examine those drawings, the targeting implications seemed to have been lost on them. While these gun bunkers were proof against fire from directly offshore as well as naval fire coming obliquely from offshore to the rear, there was still one direction in which they were vulnerable. A ship close inshore in the direction of the embrasure could land shells near or behind the protective blast wall, and perhaps even in or near the embrasure. Although the chances of destroying the gun were still slim, gunfire delivered on such a gun-target line had a much greater chance of neutralizing (stunning/demoralizing) the crew.
The bombardment plan overlooked this point. Taking the destroyers as an example, those bombarding the beach defenses were split into two groups (located to the eastern and western flanks of the beach) and were assigned targets on their corresponding halves of the beach. As a result, their gun-target lines would usually send shells at the enfilading positions from the worst possible angle. The Emmons and Baldwin, both directed to fire on WN62, would fire on their target from positions to the east of it, meaning their gun-target lines could not possibly place rounds that might threaten the embrasures or crews of the two concrete emplacements for the 75mm guns.
Figure 8. An overhead view of WN62. The blue lines show the orientation of the protective blast walls that shielded the embrasures. The blast walls were about 15-20 yards long. The orange arrows show the principal directions of fire for the 75mm guns. The red and yellow lines represent the gun-target lines for destroyers Baldwin and Emmons, respectively. Based on their positions offshore, these destroyers had little chance to neutralize these bunkers or other west-facing emplacements.
Similarly, the Baldwin was directed to fire at WN61, as was the 5-inch battery of the Arkansas. Again, both ships were located somewhat to the east of the target, meaning it was impossible to see even partly around the blast walls or threaten the embrasures. This was particularly unfortunate as the west-facing 88mm anti-tank gun was in that position.
It must be pointed out, however, that the Emmons and Baldwin weren’t in totally useless positions, as their gun-target lines had somewhat more favorable angles on the eastward facing positions in WN62. But this merely emphasizes the point that such positions should be bombarded by ships with complementary gun-target lines so that embrasures could be threatened by at least one of the ships no matter which direction the bunker faced. Neither Hall’s nor Bryant’s order addressed this.
In a few cases, a ship had a decent gun-target line. HMS Tanatside was one of those. Directed to fire on WN65, its gun-target line had a favorable (but not ideal) angle on the eastward facing bunker in that position. Its gun-target line would have been much more favorable had it come a couple thousand yards closer inshore.
Figure 9. Actual and alternate positions and gun-target lines for HMS Tanaside. The yellow line for the Tanatside shows the distance the ship closed while firing and the red line points to its target at WN65. The blue line from WN65 indicates the direction of the blast wall protecting the east-facing bunker. Had the Tanatside been able to start firing from closer inshore, it could have obtained a much better firing line on the bunker. The proposed alternate position shown for the Tanatside was still 4,000 yards offshore (3,500 yards closer inshore than its actual position).
And this would turn out to be an issue during the bombardment. While the destroyers heroically came in so close to shore later in the day that they risked grounding, during the pre-H-Hour bombardment the plan had positioned them so far offshore that it limited gun-target lines to unfavorable angles on the targets. The plan did direct them to close inshore as much as possible; in the next installment we’ll see how well that played out.
It would seem very little thought had gone into the positioning of the various bombardment ships relative to the location and configuration of their targets, or relative to the position of other bombardment ships. The reports of ships having to check fire as a sister ship drifted into the gun-target line would also indicate this.[28] The plan’s organization of the water off the beach (Figure 1) was taken almost directly from the generic example diagram in F.T.P-167. But German defenses at Omaha were not generic, and a more sophisticated set of fire support lanes should have been developed to effectively carry out the bombardment mission. Any attempt to address this problem would have had to create something along the lines of a third fire support area in the middle of the boat lanes. From there two or three destroyers could get better angles on the on the embrasures which ships in the flanking fire support areas could not possibly threaten. While such a solution would introduce additional problems—which should not be underestimated—it was the only way to spot and strike at these hidden gun positions.
A Question of Scale vs Psychology
So far we have considered the bombardment plan only from a quantitative perspective, as if it were some sort of mathematical equation: X number of projectiles delivered to an area Y yards square will neutralize the position. But combat is a human endeavor, and such a mathematical approach ignores the human factor. A bombardment that will break and route one defender may have little effect on another defended with higher morale or better discipline. And in that truism may lie much of the blame for the failure of the Omaha bombardment.
Figure 10. This figure depicts the combined targeting from all naval bombardment ships and craft (except the LCS(S)s). While it appears comprehensive, many details would combine to substantially reduce the potential effects of the bombardment plan.
The bombardment was designed with the expectation that the defenses were manned by a limited number of low quality troops from the 716th Infantry Division, a ‘static’ formation incapable of offensive operations. Despite the impressive strengthening of the physical defenses under Rommel’s prodding, the men manning the defenses were the same old men, young boys and convalescents. Worse (though better for the invaders), a substantial number of the division’s troops were conscripted Poles whose loyalty to the Reich was almost nonexistent.
Most of the defenders’ hardened positions (gun casemates, troops shelters, ammunition shelters, etc.) were built to standards that made them basically proof against 5-inch shells, which was part of the reason the objective was neutralization, not destruction. Neutralizing effects—stunning and demoralizing the defenders—are largely dependent on morale. And the morale of the static 716th Infantry Division’s troops wasn’t expected to be very high. With the strongpoints thinly manned, with almost no artillery support and almost no reserves at hand, the defenders’ sense of isolation would have been much greater. The defenders’ morale, already weak, would have been especially vulnerable to the psychological effects of the bombardment.
But all that changed when Rommel ordered the 352nd Infantry Division to move forward to bolster the defenses. Steven Zaloga’s detailed analysis indicates the Omaha defenses had been tripled by the addition of two rifle companies of the 916th Infantry Regiment (part of 352nd Division) as well as detachments from that regiment’s heavy weapons company, infantry gun company and anti-tank company. In addition, two engineer companies had moved in just behind the line of beach defenses.[29] The reinforcements from the higher-quality 352nd Infantry Division served to stiffen the original defenders, and the presence of reinforcements from the 352nd located to the rear would have further raised the defenders’ morale.
Perhaps the greatest boost to the resolve of the defenders was the four 105mm and three 150mm batteries of artillery, where before the defenders had just one.
All in all, the defenders on 6 June were far less likely to suffer the demoralization effects than the original garrison the plan was based on. The neutralizing/demoralizing effects of bombardment are to a major degree dependent on the morale and quality of the troops being attacked. And the bombardment at Omaha found itself attacking far stronger defenses than had been anticipated, in both physical and morale respects. This key factor of psychological vulnerability/resilience is typically omitted from analyses of the Omaha bombardment. And that is a critical failure, for the psychological state of the defenders was perhaps even more important than the depth of concrete or weight of projectiles.
The intelligence failure was a matter beyond Hall’s and his planners’ hands. What they absolutely could affect, however, were the details of the bombardment plan. Did they employ their bombardments assets in the best way possible, or even reasonably well? This analysis calls that into doubt. Given that Hall had complained long and loudly that he had been given woefully inadequate bombardment assets, some of his decisions are open to question. Was the Frankfort’s diversion to the offshore screen during the bombardment period wise? Was the failure to incorporate the Augusta into the bombardment plan wise? Why was the Texas assigned the Pointe du Hoc mission? Why were so many destroyers/escort destroyers assigned targets that addressed neither the defensive nor offensive tasks of the bombardment? Why did the fire support areas provide such unfavorable gun-target lines? Why were less suitable projectiles selected? Given these questions, it may be that the failure of the bombardment was not so much a matter of too few bombardment ships or too little time for the bombardment, as it was poor use of the assets at hand.
In the Next Installment . . .
I had planned to include a discussion of the air bombardment plan in this installment, but it quickly became clear the discussion of both the naval and air plans would take up far too much space for one installment. So, the matter of employing strategic heavy bombers in tactical support of an amphibious landing will have to wait a week or two. At that time, we’ll examine whether the B-24s were capable of delivering even a fraction of the ordnance that Hall and Gerow were counting on (assuming weather permitted visual bombing) or whether the entire plan was a fantasy.
Footnotes
[1] Western Naval Task Force, Allied Naval Expeditionary Force (CTF-122), Operation Plan No. 2-44. Short Title: “ONWEST TWO.”
[2] Eleventh Amphibious Force (Task Force 122), Operation Order No. BB-44.
[3] Most of his subordinate task groups issued their orders between 27 and 31 May.
[4] TF-124, Operation Order No. BB-44, Annex E, pg. 2 and pg. 8.
[5] The coastal artillery batteries at Maisy and Grandchamps were at the far western end of the Omaha Assault Area, but these guns were oriented towards the Utah area and could not bear on the Hall’s Transport Area.
[6] US Navy F.T.P. 167, Landing Operations Doctrine, 1938, pg. 114. The corresponding Army manual, Field Manual 31-5, Landing Operations on Hostile Shores, 1941, pg. 103, contains similar language.
[7] Ramsay’s Diary, 15 March, pg. 44
[8] In the event, one of the 105mm batteries was reserved for defending Port-en-Bessen and did not fire on Omaha’s landing beaches.
[9] Zaloga, Steven. The Devil's Garden: Rommel's Desperate Defense of Omaha Beach on D-Day Rowman & Littlefield Publishers (Kindle Edition). pg. 234.
[10] War Department Basic Field Manual, Landing Operation on Hostile Shores (FM 31-5), Washington, D.C., 1941, Chptr 6, pg. 106. Much the same guidance was contained in the U.S. Navy’s F.T.P.-167, Landing Operations Doctrine, Washington, D.C., 1938, pg. 133.
[11] TF-124, Operation Order No. BB-44, Annex E, pg. 8.
[12] CTG 124.9 Operation Order No. B1/44, dtd 31 May 1944, pg. 4.
[13] In the wake of the disastrous E Boat attack during Exercise Tiger, the American naval leaders were highly concerned about a similar attack coming from Cherbourg during the landings.
[14] The position included at least one 37mm antiaircraft gun and would become a thorn in the side of the Ranger’s position later, but that does not change the fact that those 300 rounds of 5-inch fire would have been better employed elsewhere.
[15] Ramsay Diary, 12 Apr, pg. 55
[16] Ramsay Diary, 18 Apr, pg. 57
[17] Commander, Gunfire Support Craft (CTF-124.8), Action Report – Operation Neptune, dtd. 3 July 1944, pg. 6.
[18] Ibid, pg. 7.
[19] There is a bit of doctrinal language problem here, as the US Navy did not consider ‘close support’ to be preparatory fire, rather a phase following the landing of the troops. Regardless, Ramsay’s meaning is clear.
[20] ON 8 paragraph 37,
[21] Hall’s order, Annex E, pg. 7, para 3.x.(5)
[22] CTG 124.9 (Bombardment Group) Operation Order No. B1/44, dtd 31 May 1944, pg. 5, para (12)
[23] Hall’s order, Appendix 3 to Annex E, pg 17, note at end of para 1.
[24] DESRON18 (Destroyer Fire Support Group/TG 124.9.3) Operation Order No. 7-44, dtd 2 June 1944.
[25] Headquarters, 1st Infantry Division, Field Order No. 35, dtd 16 April 1944, Annex 4 (Administrative Orders, Appendix 1 (traffic Circulation Map.
[26] Ibid. Annex 10 (Tank Employment Plan) identified only two “Special Targets” and directed one platoon of tanks to knock out each of the positions. One of the special targets was the casemate in WN60 (but did not identify the caliber of gun within). The other Special Target was WN74 (Pointe et Raz de la Percée). The new casemate in WN72, which would house the 88mm gun, was completely omitted. Subsequent changes to that order did not update the intelligence or targeting.
[27] Commander Task Force 124, Action Report – Assault on Vierville-Colleville Sector, Coast of Normandy, dtd 27 July 1944, pp. 96-7 and 103.
[28] To be more closely discussed in a following installment.
[29] Zaloga, pg. 131.