
Omaha Air Bombardment - Part I: Planning a Tactical Mission for Strategic Bombers
In the early hours of 6 June 1944, the Eighth Air Force launched an air armada of 450 B-24 heavy bombers to pummel the enemy beach defenses at Omaha with 1270 tons of bombs. The defenses would be pulverized; the landings would be a walkover. Or at least that was what many people expected. Yet a variety of hard realities would prevent even a fraction of that tonnage hitting the targets, even had the weather been clear.
In this installment, we examine several factors which limited the tactical effectiveness in employing strategic bombers in support of the amphibious landings at the Omaha Assault Area.
This analysis serves as a prelude to a following installment which attempts to clarify the mystifying circumstances of the last minute decision to delay the bomb releases, resulting in no bombs landing on target.
Omaha Bombardment. Part IIIa: After Action Summaries
Having established that the Omaha Bombardment Groups as a whole fired only a bit more than half of the projectiles it was supposed to have used on the beach defenses, it is now time to examine the performances of the individual ships. This installment summarizes to the pre-H-Hour bombardment activities of every ship in the Omaha Bombardment Group, identifying its fire support position, targets and expenditure of ammunition against it assigned targets.
Omaha Bombardment. Part III: The Execution
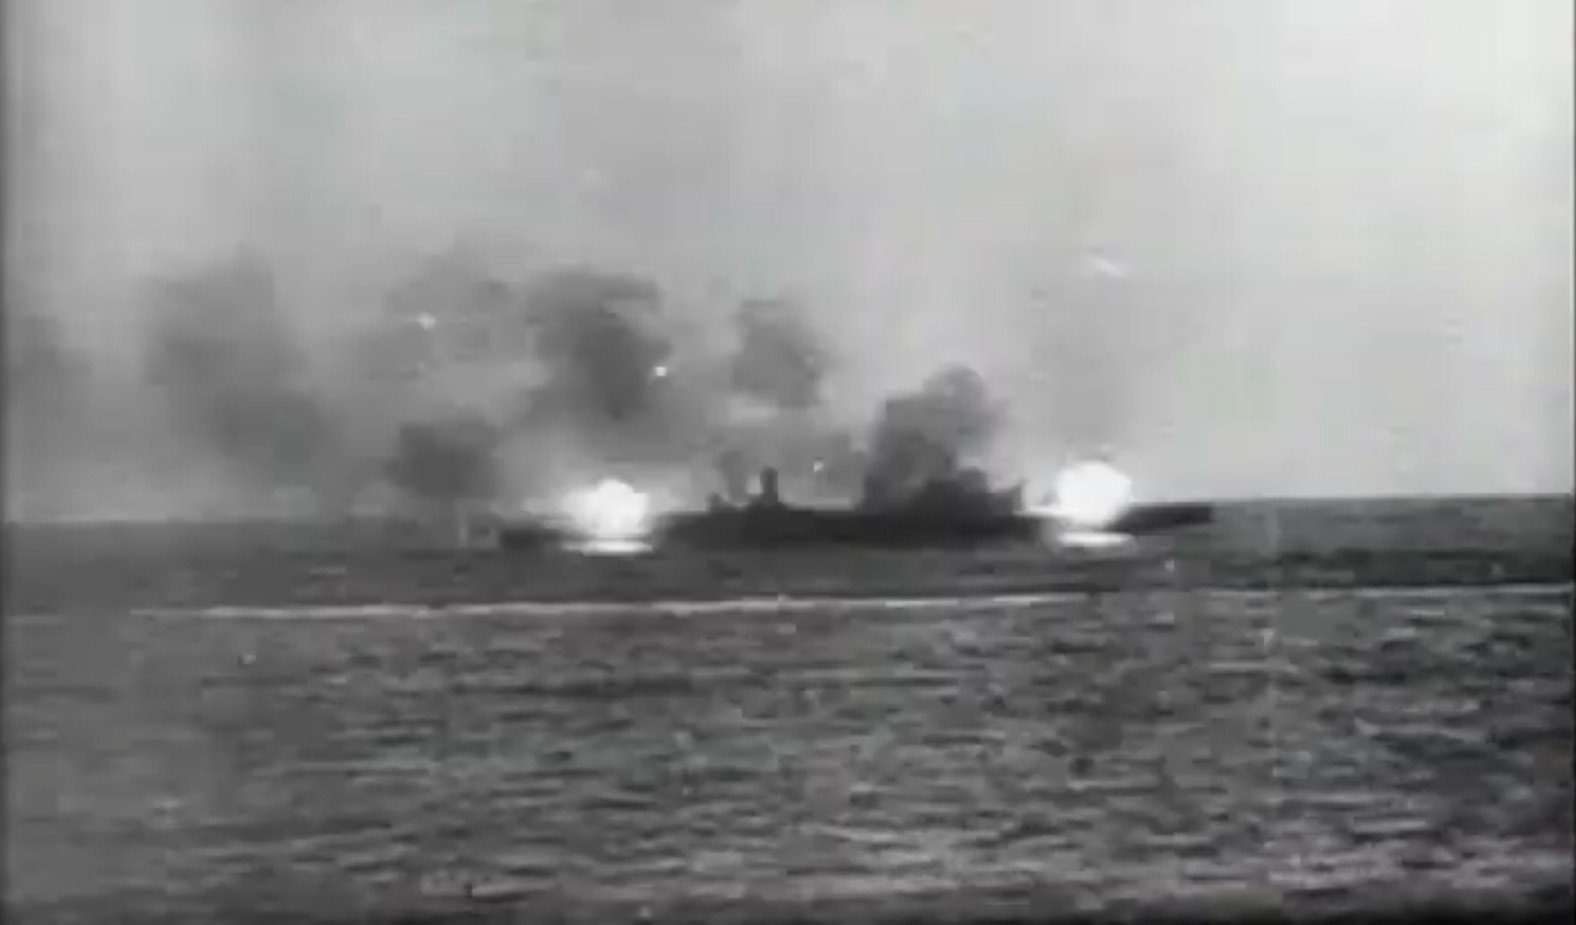
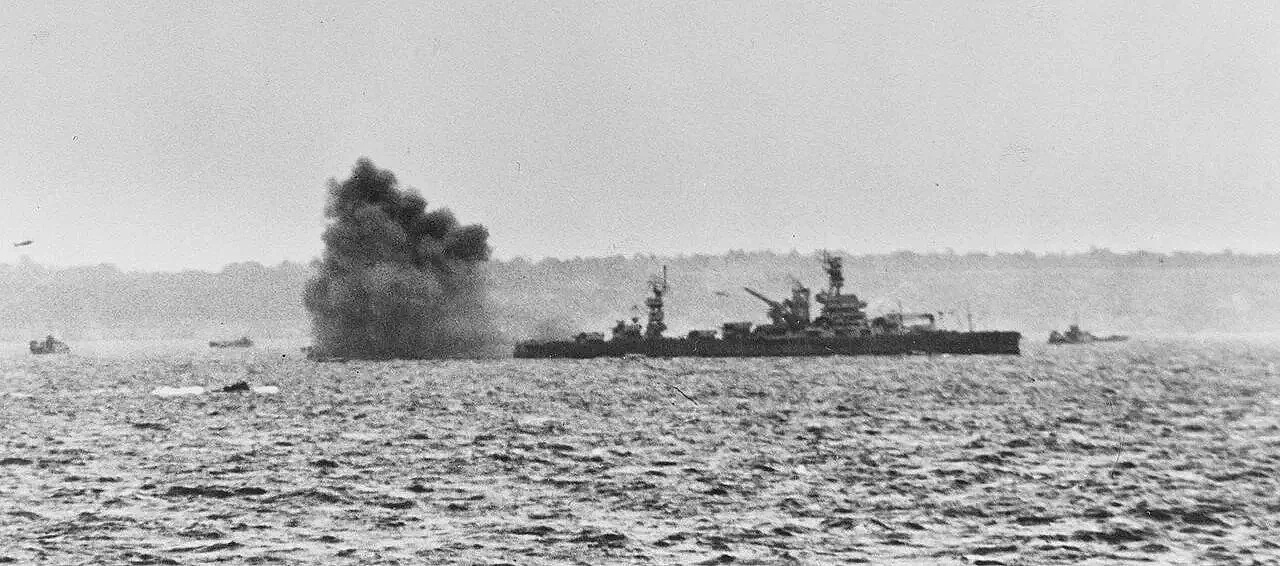
In the wake of the fierce resistance encountered during the landings in the Omaha Assault Area, Real Admiral Hall blamed much of the difficulties and bloodshed on a lack of bombardment ships and a much too brief time to conduct the bombardment—not to mention the failure of the air bombardment. But Hall failed to mention other key failures with more direct impacts.
This installment establishes that Hall’s pre-H-Hour bombardment was only partially executed, with his bombardment ships firing just half of the ammunition they should have. His smaller gunfire support craft had similarly poor expenditure rates. The bombardment was further hampered by poor synchronization with the landing of the leading waves, poor deconfliction of ship positions and gun-target lines, and poor positioning of ships relative to the configuration of their targets.
As executed, the bombardment fell far short of its potential effect on the defenders, and contributed to the casualties among the assault troops. While the destroyers were rightly celebrated for coming to the aid of the troops pinned down on the beach later that day, the unfortunate fact is they they were also partly responsible for that deadly situation by failing to aggressively prosecute their pre-H-Hour bombardment tasks.
Omaha Bombardment. Part II: The Plan
After much concern and many complaints about his perceived lack of naval bombardment assets, Admiral Hall (commanding the Omaha Assault Force) developed a detailed bombardment plan to make the best of what he had to work with. Published and refined in the weeks before D-Day, the plan sought to employ his limited assets in the most effective ways possible, going so far as to incorporate strategic heavy bombers and a variety of smaller, less conventional fire support assets.
This instalment examines that plan with an eye to determining how well those assets were allocated and the adequacy of the coordination and guidance contained in that order. This analysis calls into question the effectiveness of much of the plan, which left a substantial percentage of guns idle or assigned to non-essential targets during the preparatory bombardment. The plan also included factors that limited the effectiveness of the fires on the primary bombardment tasks.
Follow me on a deep dive into some of the actual factors that resulted in the failure of the Omaha bombardment mission.
Omaha Bombardment. Part I: Setting the Stage
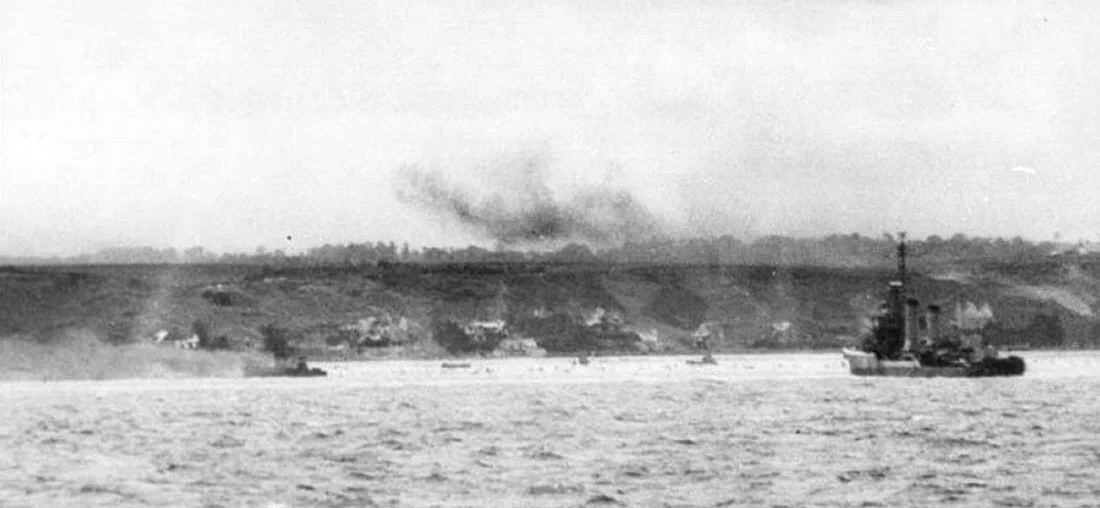
Perhaps the single greatest failure at Omaha Beach was the bombardment plan. Despite the efforts of 16 bombardment ships and dozens of supplemental bombardment craft, German defenses emerged sufficiently undamaged to virtually stop the invasion at the shoreline for the first hours. Many reasons have been advanced for this failure, to included a shortage of bombardment ships, too short of a bombardment window and the failure of the heavy bombers to hit the beach defenses.
This three-part series examines the facts behind the bombardment controversy and attempts to separate the valid criticisms from the popular misconceptions. This installment, Part I, explores the operational environment and how it shaped the basic concept of the landings, as well as how that constrained bombardment operations. Part II will examine in detail the bombardment plan developed for Omaha Beach, and Part III will analyze how effectively that plan was executed.
Join me to see what really lies behind the popular versions of the Omaha bombardment failure.

The Duplex Drive Tanks of Omaha Beach, Part (f) Conclusions and Final Thoughts
This is the concluding installment in my six part dep dive into the facts surrounding the employment of Duplex Drive tanks at Omaha Beach. In this analysis I recap the roles played by the prominent figures in the saga and the degree to which they contributed to the outcomes on D-Day. Also is included a brief review of how the commanders at Utah, Sword, Gold and Juno Assault Areas planned for employment of their DD tanks, and how the results at those beaches compared to Omaha.

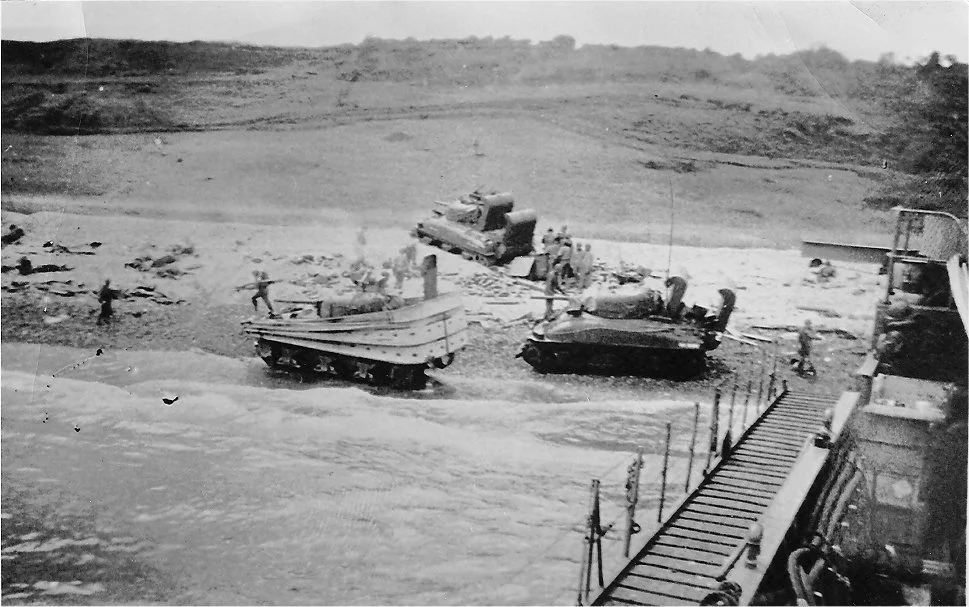
The Duplex Drive Tanks of Omaha Beach, Part (e) Success at the Dog Beaches
This installment follows the DD tanks of the 743rd Tank Battalion, which were scheduled to land on the western half of Omaha Beach. These tanks belonged to Company B (CPT Charles W. Ehmke) and Company C (CPT Ned S. Elder) and were embarked in eight LCTs under the command of Lt.(jg) Dean Rockwell, USNR. In contrast to the debacle on the eastern half of Omaha Beach, the popular story of the landing of the 743rd’s tanks was one of complete success, due primarily to the excellent judgement and resolve of Lt.(jg) Rockwell - and maybe CPT Elder, too, depending on which story you read.
This installment digs into the facts behind that popular story, relying on Rockwell’s little known 1990 oral history which revealed a key element of the popular story was not entirely true. It also includes a never-before-published photo taken of a knocked out DD tank on Dog White beach sector.

The Duplex Drive Tanks of Omaha Beach, Part (d) The Debacle Off Easy Red and Fox Green
In the early hours of the 5th of June 1944, the 64 Duplex Drive Sherman tanks of the 741st and 743rd Tank Battalions left Weymouth Bay aboard 16 Landing Craft, Tanks. It was a rough crossing, testing both men and the landing craft. But far worse trials awaited the tankers the next morning as they had to fight a deadly battle with the seas off Omaha Beach before they could even come to grips with the enemy. This installment focuses on the ordeal of the 741st Tank Battalion, which was slated for the eastern half of Omaha Beach. Specifically, it details how the errors in planning and coordination stacked the deck against these men, and examines the full story behind the decision that saw 27 of their 32 tanks sink in the waters off Omaha Beach.

The Duplex Drive Tanks of Omaha Beach, Part (c) Embarkation Errors
As D-Day neared, the training of the DD tank crews and the LCTs that would carry them was completed. Final preparations were completed and the DD tanks were embarked and sailed to the departure ports, there to await the order to launch Operation NEPTUNE. Simultaneously, planning at the three higher echelons above the DD/LCT project matured and finally resulted in the publication of operation orders. Unfortunately, these orders conflicted with some of the preparations that had already been set into effect. When combined with errors in the embarkation process, the result was a cascading series of decisions and circumstances that would be hard to overcome on D-Day.

The Duplex Drive Tanks of Omaha Beach, Part (b) Confusion of Command
Faced with an acute shortage of both naval ships and time for pre-landing bombardment, the U.S. Army sought other means to give the leading waves an advantage in firepower. One of these solutions was the Duplex Drive tank, which through the use of flotation screens and add-on propeller kit, could be launched from offshore and swim to the beach. For the Omaha landings, however, the concept was met with cool disdain by the amphibious commander. As a result, the planning for employment of these tanks was vague, sketchy and disjointed. This installment examines how the planning - or lack of planning - set the confused conditions which contributed to the loss of so many DD tanks at Omaha on D-Day.
The Duplex Drive Tanks of Omaha Beach, Part (a) Limited Means and Makeshift Solutions
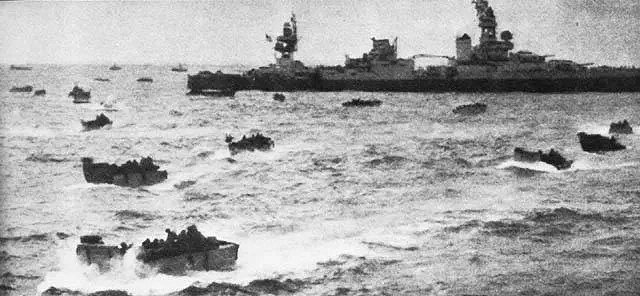
The first wave on Omaha Beach consisted of 64 Duplex Drive tanks embarked on 16 Landing Craft, Tanks. Their role was to provide critical fire support to the following waves of infantry and engineers. But things went wrong for one group, seeing 27 of their 32 DD tanks sink, while the other group landed its tanks directly on the beach. This article examines the decisions, plans and senior command attitudes in the weeks leading to D-Day which set the context and influenced the final launch-or-land decisions for the DD tanks.